When working with YouTube Booster, proxies are very important, as this is what keeps you anonymous, won’t get your accounts banned, and allows you to work with multiple profiles simultaneously. Right selection of proxies and their complete preparation may completely turn your promo campaign on or off. In this guide, learn how to choose really good proxies and prepare them for the best results with YouTube sub bot.
Why are proxies necessary?
The proxies will mask your original IP address and location by acting simply as mediators between your device and the internet. Why you need proxies for the YouTube Booster:
- Unique Views: YouTube’s algorithm monitors IP addresses to track unique views. With proxies, you will be able to create views from different IPs, making it look natural.
- Avoiding Restrictions: Some IPs are blocked or flagged at YouTube. High-quality proxies will help to get around these restrictions.
- Scaling: Using proxies allows you to run multiple profiles and threads for handling large-scale campaigns.
Types of Proxies and Their Use Cases
It supports most types of proxies, each with its merits and application scenarios.
1. Mobile proxies (recommended)
Best Choice: private LTE proxies with dynamic IPs.
Pros: Highly resistant to bans: most customers will always share mobile IPs.
IP Rotation via API or Intervals.
Allow up to 3 threads per proxy.
Use Case: Big campaigns needing flexibility with high anonymity required.
2. Residential Proxies
Desirable: Proxies which mask as home internet connections.
Advantages: Reliable in emulating real-user behavior.
Effective for region-specific targeting.
Limitations: Mostly have quotas on traffic; therefore, become more expensive for high usage.
Use Case: Region-targeted campaigns requiring moderate traffic.
3. Static Proxies
Least Recommended: Proxies with fixed IPs.
Advantages: Affordable.
Limitations: Easily flagged on YouTube because of the single repeating IP address.
Use Case: Small-scale campaigns with low activities.
What to Avoid:
Free proxies are usually spammed, unreliable, and can easily be detected.
Seller popular proxies might include IPs that have heavy use and are flagged.
How many proxies does one need?
The number of proxies is determined by the size of your campaign:
Mobile Proxies: 1 proxy per 1,000 profiles, supporting up to 3 simultaneous threads.
Static IP proxy: one proxy per profile:
- Dynamic IP – 1 proxy for 1,000 profiles with thread limits depending on open ports.
- Static Proxies: 1 proxy for 1 profile.
Where to buy proxies?
Purchase proxies from the best proxy sellers to ensure quality and reliability. Here are some recommendations:
- Look for mobile LTE proxies with options for IP change via API or time intervals.
- Avoid much-too-popular sellers that spam IP pools to death.
- YouTube Booster’s Recommended Proxy Overview page for more detail.
Setting proxies in YouTube Booster
Having bought the proxies, let’s get to the configuring part on YouTube Booster:
1. Get the Proxy Details Ready.
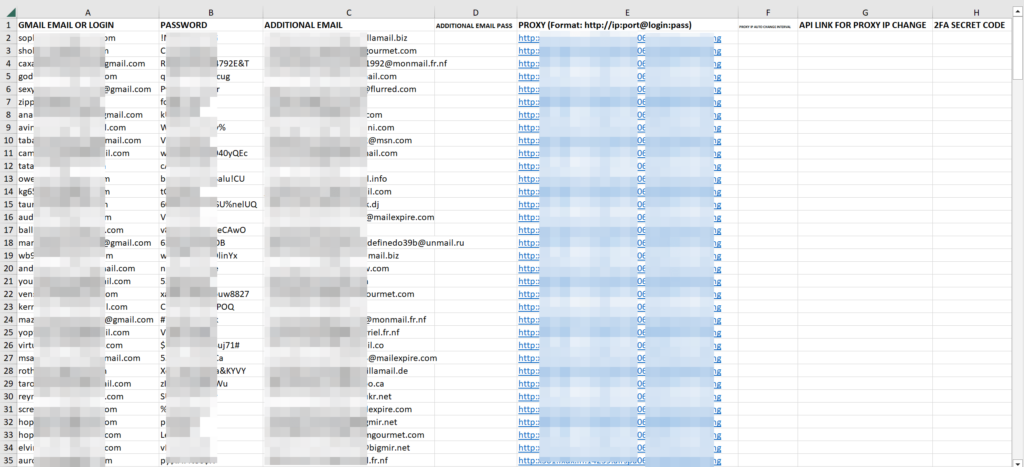
• Format: http://ip:port@login:password or socks://ip:port@login:password.
• Without the use of login/password, http://ip:port or socks://ip:port will do.
2. Enter Proxy Details
Open the files google_profiles.xlsx, incognito_profiles.xlsx in the settings folder.
In Column E, specify the proxy information in each profile.
3. IP Rotation Configuration
- For Time-Based IP Changeable Proxies: Enter the range in Column F in minutes.If it cycles every 10 minutes for example, you would set 9 in here, that way the script will finish what it’s doing before the IP flips.
- For proxies dealing with API-based IP changes: Insert API reset link in Column G. Example: http://proxy-provider.com/change-ip/12345.
4. Proxy Configuration Testing
Test the proxies to make sure they are working well before starting YouTube Booster. Check if:
- Connection stability.
- Proper IP rotation.
- Geolocation matching your target audience.
- Launching YouTube Booster with Proxies
After you’ve created your proxies, you’re ready to video boost. Here it is:
1. Open YouTube Booster
Run YoutubeBooster.exe and select the needed mode: Creation of Profile, Warm-Up, and/or Video Boost.
2. Proxy Settings
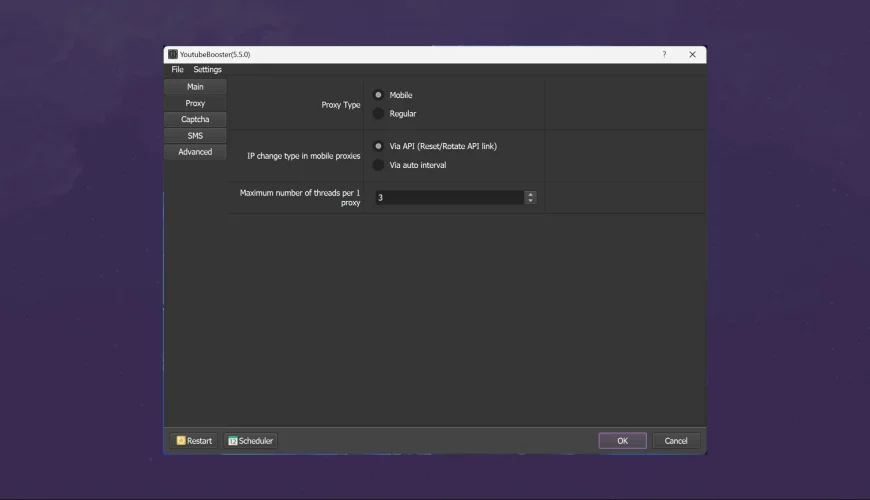
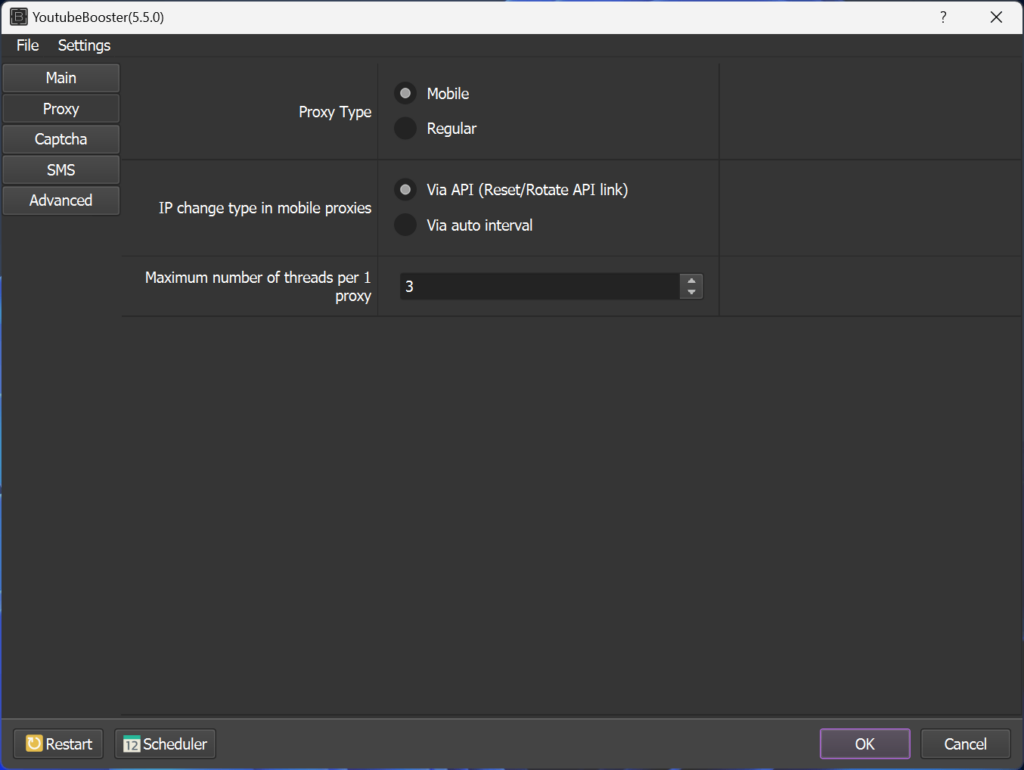
In the Proxy tab, choose the kind of proxy you use:
- Mobile;
- Residential;
- Static.
If using mobile proxies, select how you want to switch your IP:
- API: recommended for dynamic Ips.
- Interval: Specify the time interval for automatic IP changes.
3. Set amount of threads depends on your proxy type:
- Mobile: Up to 3 threads per proxy.
- Residential: 1 thread per port – dynamic IPs; 1 thread per profile – static IPs.
- Static: one thread per proxy.
Best Leveraging of Proxies with YouTube Booster
- Match Proxy Region with Accounts. Use proxies from the same region that your Google Accounts are registered with to avoid account bans or verification requests.
- Monitor Proxy Performance. Monitor the connection speed, stability, and IP rotation to guarantee smooth operation.
- Avoid Overloading Proxies. Stick to the recommended thread limits to avoid performance problems and possible detection.
- Refresh Proxies. Regularly replace old or super-used proxies with new ones every few months to keep a high success rate.
Conclusion
Proper proxy selection and setup are at the very core of how a YouTube Booster performs in your campaigns. Properly configured high-quality mobile or residential proxies, when combined with best practices for usage, can ensure smooth tool operation and the full potential of all promotional activities. This guide empowered you to make an informed decision in finding the perfect fit and avoiding common traps, definitely promising you consistency in results when it comes to boosting your YouTube videos.


